
Home / About the installation, databases and the environment
Related topics
▸ Types of databases and where you can stay
▸ Access to the database engine when hired Cloud or Hosting
▸ Uses the database of examples to practice and learn the system
▸ Basic concepts about the creation of new databases
▸ What is an access to the database?
▸ Selection of the Database when you enter the application
▸ How do I create a new database?
▸ Streamlined for the creation of databases on your local computer
▸ Advanced option for the creation of databases in the cloud or on a network
▸ Introduction to data migration from previous versions
▸ How do I migrate the information from my previous version?
▸ Migration of databases without warranty
▸ Reason to register the users who will have access to each database
▸ What happens if I do not log users?
▸ Who is the admin user of the databases?
▸ Register users and assign user profiles
▸ Create custom access levels
▸ Log of transactions
Introduction to the connection of the programs installed on your computer with the database
Except the case you have hired the service of hosting Hosting,
the programs of the complete suite is installed, run and run on your local computer.
The information that you register on the MP is stored in databases, and these can be shared by multiple users at the same time, so that
The databases can be hosted on:
- The user's PC
- Virtual teams
- All type of networks (Wan, Lan, Wlan, Vlan, etc)
- Servers or web hosting in the cloud
- On our servers in the cloud if you make the service Cloud or Hosting
There may also be the need to perform a connection of the programs installed on each computer to the respective databases previously created.
If you do not do so, the programs won't know where to find the information that you want to access. Then, before you create a connection, you must have created a database, or have migrated your database from version 9 to the new version. For more information, see Creation of new databases and/or Database migration from version 9 to the new version.
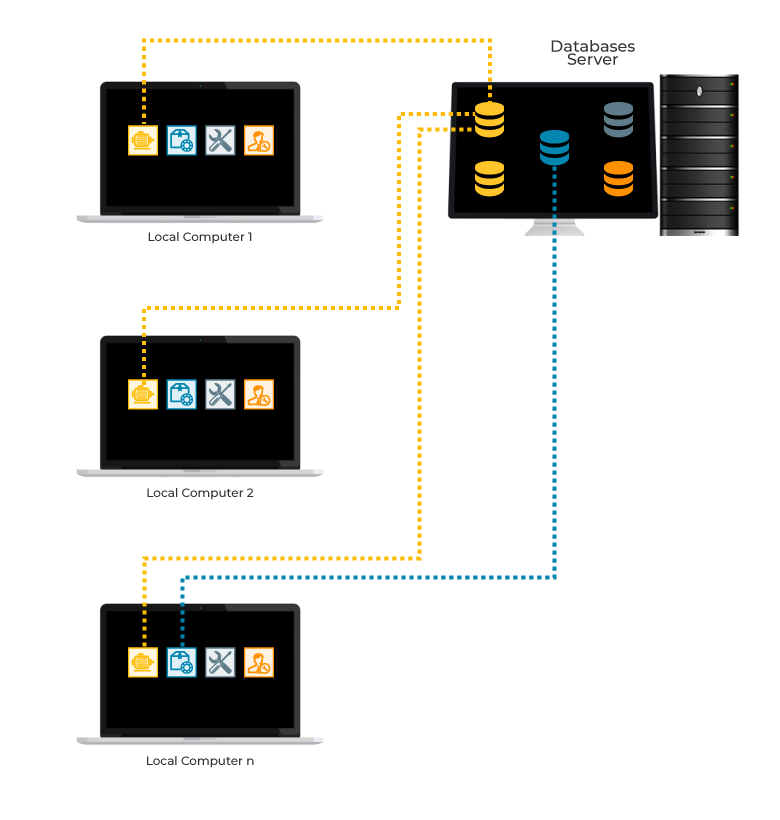
This connection process is accomplished by creating accesses on each computer where you have installed one of the programs of the suite.
Access is a file hosted on your local computer that contains encoded all the information related to the name or IP of the server and the names of the(s) base(s) of data that each program will have access to.
Create a shortcut on your computer to connect to a database
Remember that:
Access is a file hosted on your local computer that contains encoded all information regarding the IP address or name of the served and the names of the(s) base(s) of data that each program will have access to so that once you have created your access, you'll be able to access the database automatically.
There are two options for creating access to the databases.
Option 1. Since the applications in the Suite

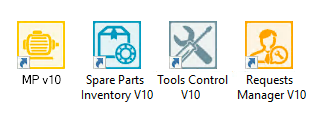
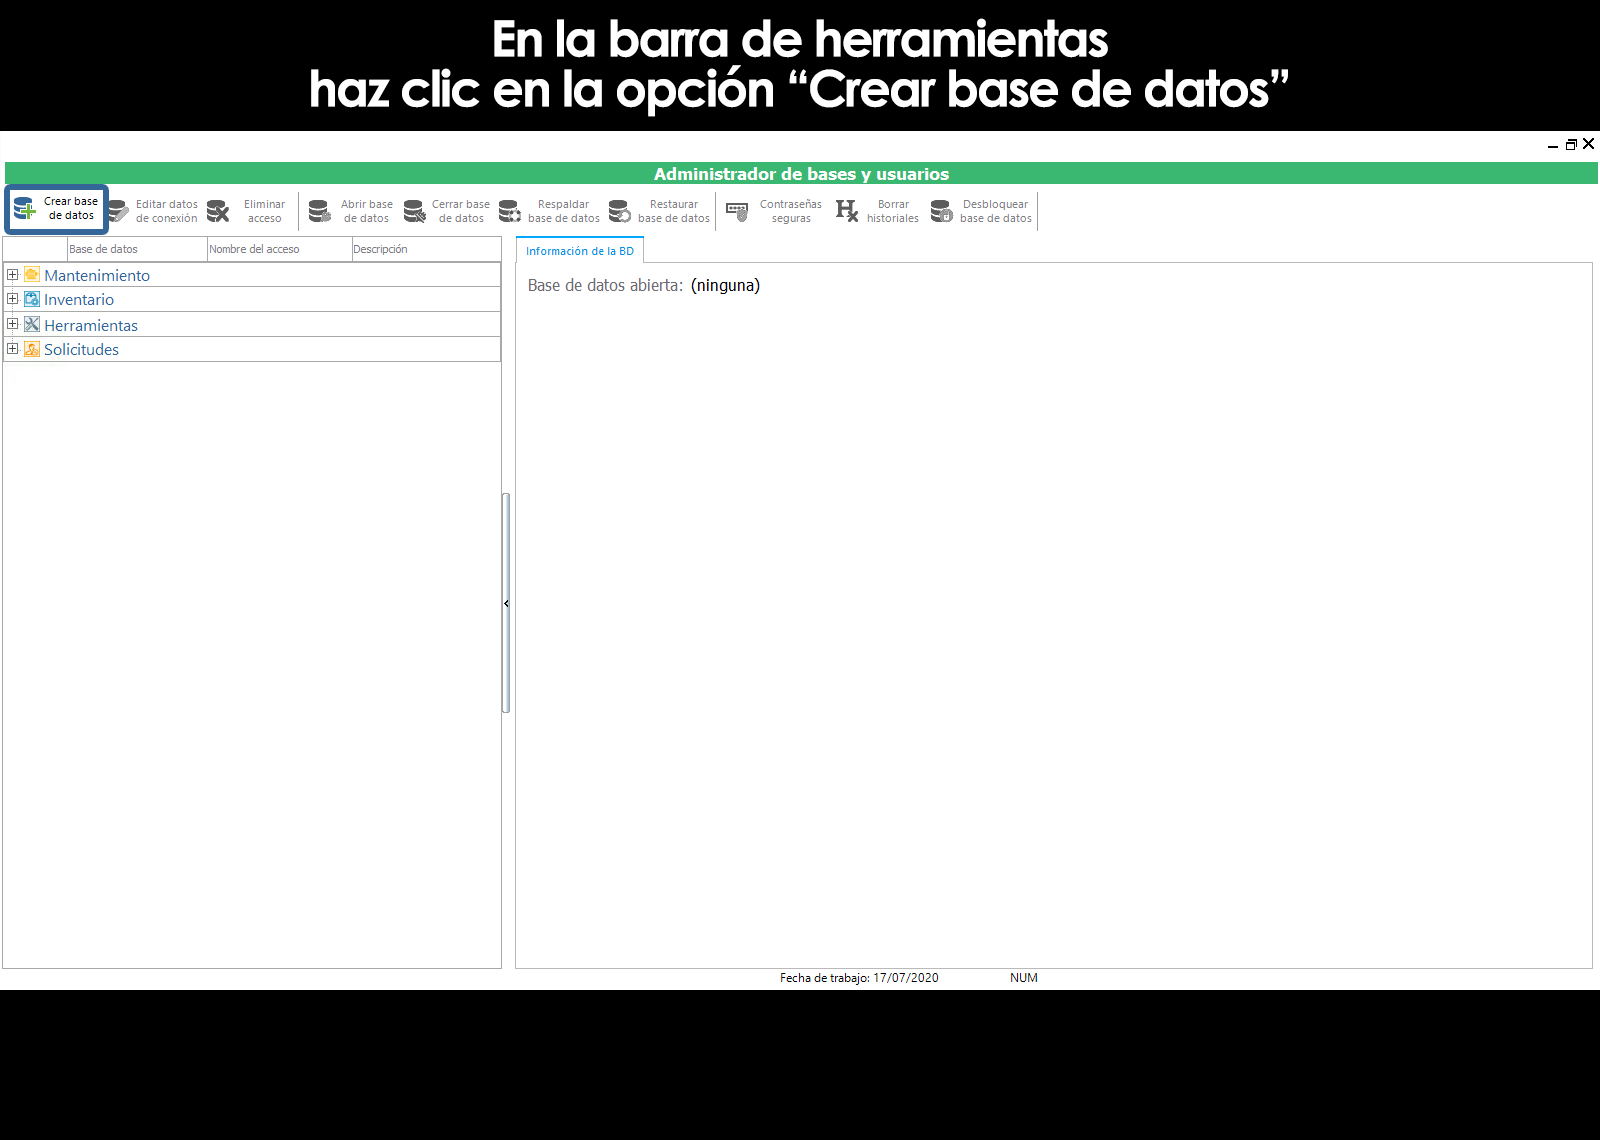
Option 2. From the desktop application, Database Administrator and Users

Note:
Below, we'll explain the Option 1 for the creation of an access database and what is explained here, it applies almost like when we do so from the Option 2.
Then, when you run any of the applications in the Suitechoose the option “Start using my databases”.
Click on the button Next.
Click on the button Add a database.

Click on the button Add a database.

Choose “Connect to a base of MT view.10”
Click on the button Next.
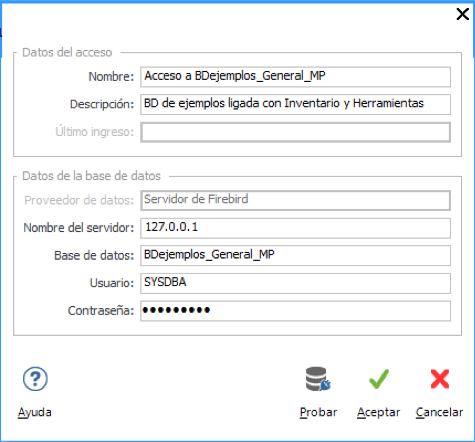
Indicates the access data to the server, and the name of the database to which you want to connect to.
In the first field, enter the IP address of your server or database server name where is located your database. What is this?
In the following two fields, write down the name of a user name and password with permissions and privileges to create database and connections on the engine selected. For more information, see What is this?
Type in a name as you will identify the access to the selected database and a long description that will allow you to further identification of the access.
Example:
| Name of the database See characters and permitted length. |
Name of the access to the database What is this? |
Long description of the database |
| PLANTA_SPEREN_1 | ACCESS TO PLANTA_SPEREN_1 | PLANT SPEREN PARQUE INDUSTRIAL EXPORTEC II |
| PLANTA_SPEREN_2 | ACCESS TO PLANTA_SPEREN_2 | PLANT SPEREN PARQUE INDUSTRIAL HUEHUETOCA |
| PLANTA_SPEREN_3 | ACCESS TO PLANTA_SPEREN_3 | PLANT SPEREN INDUSTRIAL PARK JILOTEPEC |
| HOTEL_Mara_A | ACCESS TO HOTEL_Mara_A | Hotel All Inclusive Mara Place, Cancun, QR |
| HOTEL_Mara_B | ACCESS TO HOTEL_Mara_B | Gran Executive Hotel Mara Place mexico City, Mexico |
| HOSPITAL_TRAUMATOLOGIA | ACCESS TO HOSPITAL_TRAUMATOLOGIA | Hospital of Traumatology Loma Verdes, Naucalpan |
| HOSPITAL_NEUROLOGIA | ACCESS TO HOSPITAL_NEUROLOGIA | National institute of Neurology and Neurosurgery, CDMX |
| FLOTILLA_1 | ACCESS TO FLOTILLA_1 | Fleet Cars and trucks SPEREN EXPORTEC II |
Important note.
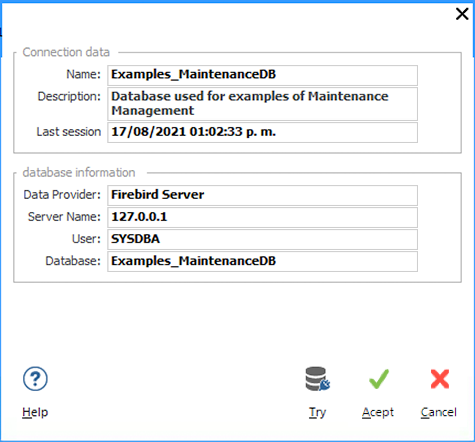
The process described here, you don't have to repeat it each time you enter the system, since the access and all the information of the same is recorded on your local computer. To access the information of your databases, go to the system you only have to select the name that you have assigned to the access.
Connection of the database with mobile devices
When you run any of the programs of the suite, the first thing that appears is a window requesting the user to select the access database that you want to work
To the right you can see the information of the access to each database.
This information is also recorded in a QR code, which will facilitate the connection of mobile devices to the database.
The QR code that appears in the window will be of great utility to facilitate the connection of mobile devices to the database. For more information, see connection of mobile applications MPmobile and MPsolicitudes (The QR code is available for MySQL databases, SQL, Oracle, MariaDB, and Cloud. The QR code is not available for databases Firebird).
Can't find the answer to your doubts or questions?
Additionally, we offer training courses
Our flexible options of online training and face-to-face will provide you with all the knowledge necessary to understand and implement your software maintenance.
Contact us
×

Server IP, user name and password of the database engine
Today, virtually all companies have at least one IT professional who is responsible for, among many other functions to manage the data and servers of the company. Among their functions include the administration of a database engine, which, for security reasons, has access by means of a user name and a password. If not, any person could enter the network, and provide high-databases, query, modify and even delete confidential information of the company.
For example:
| DATABASE ENGINE | ADMINISTRATOR USER BY DEFAULT | PASSWORD (Known only to the manager of IT) |
| MySQL | root | ****** |
| Microsoft SQL-Server | sa | ****** |
| Oracle | System | ****** |
| MariaDB | root | ****** |
| Firebird | SYSDBA | ****** |
When you create a database, or a new connection on the MP, the program prompts you for the server name or IP where you will create or is the database to which you want to connect to, as well as a user name and password.
The username and password that here we ask, are precisely those that allow access to the database engine permissions privileges to create the database.
Now, the administrator of the database can also create different user accounts to allow access to more people by giving them privileges and permissions custom.
With the aim of not to use the administrator user of IT and its respective password each time that the department of maintenance required to create a database or a connection to an existing database, it is recommended that the IT administrator create a user account specifically for the maintenance department.
A single user account to the database engine is sufficient for the creation and connection of multiple databases.
The username and password that here is requested, you do not have any relationship with the licenses of use are acquired or the amount of users that can access the database, so that a single user account can be enough, because in this case it refers specifically to the user and password of the database engine.